
Granny Square Vest Crochet Pattern
- Ina

- Jan 12, 2024
- 4 min read
Updated: Aug 9
This granny square vest pattern is versatile and beginner-friendly, perfect for using up scrap yarn.
There is a downloadable PDF version here. Donations are optional, but they help me keep making patterns for you! Thank you <3

WHAT I USED:
5mm hook
Primarily cotton and acrylic mix yarn by Yarn Art, but also scrap yarn.
The size of your stitches depends on the yarn weight and hook size; the above is what I used to get the size in the pictures.
Stitches (US):
Single Crochet (SC)
Double Crochet (DC)
Chain (CH)
Slip Stitch (SLST)
NOTES:
After the third row, you'll fall into a pattern for all following rows.
This pattern makes a size small vest, you can make it bigger by adding more rows onto your project.
I recommend to weave in the stitches as you go.
Each comma in the pattern instructions represents a new stitch, and the brackets indicate crochets to be worked into the same stitch.
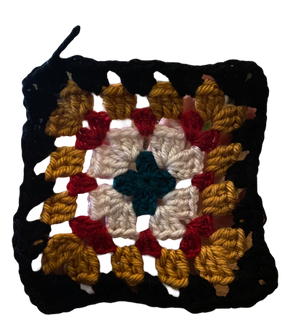
MAKING TWO PANELS FOR THE BODY
ROUND 1

Make a magic circle and ch3 (counts as first dc throughout), 2dc and ch2.
Then 3dc, ch2 three times.
Pull tail tight to close circle and join with slst to beginning ch2.
Trim the tail and crochet over it as you go so that you don't have to weave it in later. (12dc - 4 clusters of 3dc with ch2)

ROUND 2
Change yarn colour and slst into any corner space.
(ch3, 3dc), ch2
Then repeat (3dc, ch2, 3dc) in all ch2 spaces from the previous round (you're making all corners)
Join with a slst to beginning ch3. (24 dc)
All remaining rounds are similar, you just need to increase the 3dc clusters between the corners as you go.
ROUND 3
Change yarn colour and slst into any corner.
(ch3, 3dc, ch2, 3dc), ch2 (first corner made).
(3dc, ch2) in all ch2 spaces across.
Repeat corners (3dc, ch2, 3dc, ch2) and make clusters of 3dc, ch2 in all the spaces around.
Join with a slst to beginning ch3.
Each round that follows uses this pattern. Continue until you have 14 rounds - you can add more rounds if you want a bigger size.


When not changing yarn colours, make sure to slst into the corner space before starting your round.
Make 2 square panels, one with a slightly altered neckline (though the neckline is optional).


THE LAST TWO ROWS (NECKLINE)
When you get to the last two rows, work three normal sides and make one of them following this pattern:
Make a normal corner (3dc, ch2, 3dc, ch2) and make 3 3dc, ch2 clusters. You should have 4 clusters (counting half of the corner too).
Count 4 spaces from the other end of the row and put in a stitch marker (or just keep it in mind).
In the rest of the stitches until the stitch marker, make clusters of 3sc, ch2.
In the last 4 spaces, go back to doing your original clusters of 3dc, ch2.
Go around with three normal sides, and repeat this again when you get to this row.
SHOULDER STRAPS
Now that you have the panels, its time to connect them. Start with one of your panels.

Row A: Starting in a corner space, ch5 (counts as 1dc and ch2), make two 3dc, ch2, clusters then 1dc. (You should have two 1dc and two 3dc clusters across 4 spaces).

Row B: turn your work and ch3, 2dc, ch2 in first space (cluster made) then 3dc, ch2 in the next two spaces. (you should have 3 3dc, ch2 clusters)
Keep alternating these rows for as long as you want your straps to be - I did 9 rows total in the one pictured. Make sure you end with row B.
CONNECTING THE PANELS
To connect the strap to the other panel do this variation of row A:
Turn your work and align the second panel in front of the panel your working on.
ch3 and slst into the corner space (see image on right) - you may be working from the third space out, depending on where your row finishes.
slst 3 across the 3dc cluster of the second panel and into the space.
Then 3dc into the strap, but slst each dc to the space in the second panel. This is to secure the strap to the second panel (see images on right). Repeat this process to make another cluster.
slst 3 and 1dc in the last space of the strap, slst to secure in corner of the second panel.
Fasten off and weave in tail.


SIDE STRAPS

The side straps are made the same way as the shoulder straps, just on the sides of the panels.
I did 5 rows on the example, this again depends how wide you want your vest to sit.
Optional: You can add two straps on the side (as can be seen in the photos of the black tank). On that one, I made the second strap up one cluster thinner than the bottom (two clusters across rather than one).
ADDING SOME ROWS TO THE BASE
You can finish here, but I like to add two rows of 3dc, ch2 all the way around the base of the vest.
When you get to the corner (see photo above), do 1dc in the corner space and 2dc in the strap dc to kind of merge the part together.
You can also add a row or two of double crochets if you find you need some more coverage on the sides (around the arm holes).


